给自己弄一个博客既有助于锻炼自己的能力,也有助于激发自己对于记录的兴趣。而一个好的博客界面更是能激发自己记录的动力。最近在搜一些资料时碰巧看到非常喜欢的一个二刺螈界面,当时就决定要弄一个这样的。查了查GitHub上给的文档,发现这个界面也是基于wordpress的,所以先得安装一个wordpress。
先介绍一下自己所拥有的资源吧:腾讯云轻量应用服务器,装了CentOS7系统。
可以通过putty,xshell等工具远程登录服务器,服务器运营商也可能会提供远程登录的其他方法,比如腾讯云轻量应用服务器就可以通过网页登录。
这个服务器用了也快一年了,首充可以薅羊毛只要几十块,现在续费好像要一千多一年了。CentOS7系统算是比较经典的Linux系统,工作上也用,相关资料也多,是入门Linux的比较好的系统(本人接触Linux不到一年,算是小白)。所以目标就定为在这个这个服务器上安装wordpress。关于wordpress安装方法的介绍网上很多,但实际使用起来发现很多都不适用。但选好关键词后还是找到了一些能用的资料。以下是使用日志,默认在root账号下操作,否则请自行添加sudo:
安装Apache服务器
http安装,启动,添加到开机启动
-
yum -y install httpd
-
systemctl start httpd.service
-
systemctl enable httpd.service
firewall安装,启动,添加到开机启动
-
yum -y install firewalld firewall-config
-
systemctl start firewalld.service
-
systemctl enable firewalld.service
配置firewall,重新载入
-
firewall-cmd --permanent --zone=public --add-service=http
-
firewall-cmd --permanent --zone=public --add-service=https
-
firewall-cmd --reload
安装MariaDB
mariad安装,启动,添加到开机启动
-
yum -y install mariadb-server mariadb
-
systemctl start mariadb.service
-
systemctl enable mariadb.service
mysql安全向导,建议全选y,我只在"Disallow root login remotely"选了n
-
mysql_secure_installation
关于login remotely
由于我是通过putty远程登录linux服务器进行操作的,最开始将这个选项误认为是禁用putty远程登录服务器对mysql进行操作。其实这个选项是针对mysql自身存在远程登录:比如我windows主机装了mysql就能够直接通过这个mysql软件远程登录到服务器里的mysql数据库。而禁用这个选项就是禁用这种通过mysql软件的远程登录。
如果你在自己的电脑上也装了mysql,就可以尝试用:
mysql -h IP -P 3306 -u root -pPASSWORD
(其中IP为你服务器的IP,PASSWORD为你设置的服务器里mysql的密码)的方法来进行远程登录。
不过在此之前你需要确保服务器防火墙放行端口3306(mysql服务默认端口,注意如果你的服务器运营商还有一层防火墙(比如腾讯云,华为云都设有另一层防火墙),也需要打开这个端口(入方向))
如果你没有禁用login remotely,那么你将看到:
Welcome to the MariaDB monitor.  Commands end with ; or \g.
Your MariaDB connection id is 11
Server version: 5.5.68-MariaDB MariaDB Server

Copyright (c) 2000, 2018, Oracle, MariaDB Corporation Ab and others.

Type 'help;' or '\h' for help. Type '\c' to clear the current input statement.

MariaDB [(none)]>
就如同你直接登录本机的mysql一样。(如果不行可以参考文章https://blog.csdn.net/daxia5a0/article/details/103659473,对数据库进行修改)
而如果禁用了login remotely,那么将会显示无法连接:
ERROR 1130 (HY000): Host 'xx.xx.xx.xx' is not allowed to connect to this MariaDB server
安装PHP
安装php,查看php组件,安装所需组件
-
yum -y install php
-
yum search php
-
yum -y install php-mysql php-gd php-ldap php-odbc php-pear php-xml php-xmlrpc php-mbstring php-snmp php-soap curl curl-devel
新建一个php页面,并将其内容编辑如下,关于vim操作参考相关教程
-
vim /var/www/html/info.php
<?php
phpinfo();
?>
重启http服务
-
systemctl restart httpd.service
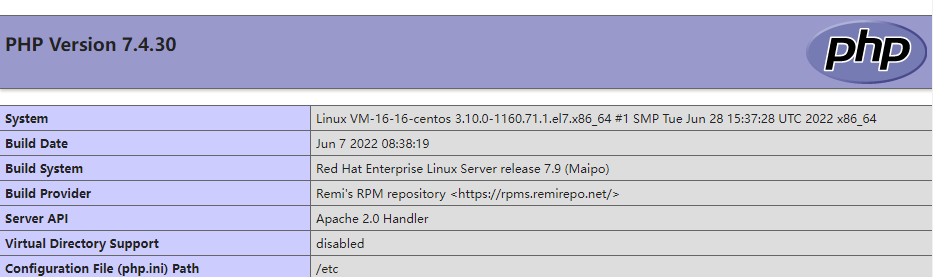
查看安装好的php信息
在浏览器地址栏输入x.x.x.x/info.php查看安装好的php信息(x.x.x.x为服务器公网IP,可以通过shell命令curl cip.cc查看)。网页会显示如下,但版本号可能不一样(默认的php版本为5.4)
配置数据库
登录mariadb,为wordpress创建数据库
-
mysql -u root -p
新建数据库wordpressdb,用户名为wordpressuser,密码为123456
-
CREATE DATABASE wordpressdb;
-
CREATE USER wordpressuser@localhost IDENTIFIED BY '123456';
更改用户权限,保存退出
-
GRANT ALL PRIVILEGES ON wordpressdb.* TO wordpressuser@localhost;
-
FLUSH PRIVILEGES;
-
exit
重启相关服务
-
systemctl restart httpd.service
-
systemctl restart mariadb.service
WordPress安装
获取wordpress安装文件,解压后复制到html目录
-
cd ~
-
yum -y install wget unzip net-tools
-
wget http://wordpress.org/latest.zip
-
unzip -q latest.zip
-
cp -rf wordpress/* /var/www/html/
修改文件权限
-
chown -R apache:apache /var/www/html/
-
chmod -R 755 /var/www/html/
-
mkdir -p /var/www/html/wp-content/uploads
-
chown -R :apache /var/www/html/wp-content/uploads
编辑配置文件
- cd /var/www/html
- cp wp-config-sample.php wp-config.php
- vim wp-config.php
对如下属性进行修改:
// ** Database settings - You can get this info from your web host ** //
/** The name of the database for WordPress */
define( 'DB_NAME', 'wordpressdb' );

/** Database username */
define( 'DB_USER', 'wordpressuser' );

/** Database password */
define( 'DB_PASSWORD', '123456' );
重启相关服务
-
systemctl restart httpd.service
-
systemctl restart mariadb.service
登录wordpress
在浏览器地址栏输入x.x.x.x(x.x.x.x为服务器公网IP)尝试访问设置好的网页,但实际发现会显示php版本过低(如果你装的是默认的5.4版本的php),如果你安装的php版本是5.6及以上的,那么此时应该已经可以登录wordpress了
安装PHP7.2
查看yum可安装php版本
-
yum provides php
升级php更新源,下载安装php7.2
-
rpm -Uvh https://mirror.webtatic.com/yum/el7/epel-release.rpm
-
rpm -Uvh https://mirror.webtatic.com/yum/el7/webtatic-release.rpm
-
yum remove php-common -y
-
yum install -y php72w php72w-opcache php72w-xml php72w-mcrypt php72w-gd php72w-devel php72w-mysql php72w-intl php72w-mbstring
显示新安装的php版本
-
php -v
php fpm安装,启动,添加到开机启动
-
yum install php72w-fpm
-
systemctl start php-fpm.service
-
systemctl enable php-fpm.service
重启相关服务
在这里我直接重启了服务器,不重启应该也行,猜测输入命令
-
systemctl restart httpd.service
-
systemctl restart mariadb.service
就行。
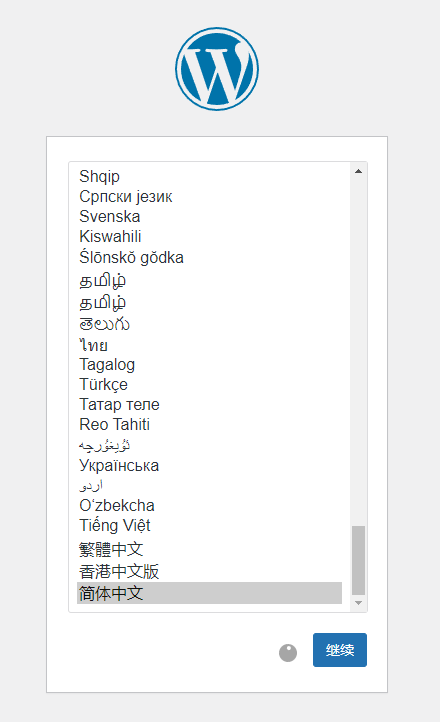
如果是从"安装PHP"跳转到"安装PHP7.2"的,继续跳转回"配置数据库"执行之后的流程,如果未跳过任何流程执行到这里,在浏览器地址栏输入x.x.x.x(x.x.x.x为服务器公网IP)应该就能看到wordpress界面:
之后就可以开始你自己的主页之旅了!
参考文档
https://cloud.tencent.com/developer/article/1047613
https://www.cnblogs.com/cssfirefly/p/10398463.html
https://blog.csdn.net/daxia5a0/article/details/103659473
封面链接
https://www.pixiv.net/artworks/91953835